Setting up authentication in Next.js can be quite time-consuming. This article aims to simplify the process for you by introducing the NextAuth library, making authentication in Next.js a smoother experience.
Prerequisites
We’re embarking on a journey to create a straightforward landing page to showcase how effortlessly we can integrate GitHub authentication into our Next.js application. As mentioned, we’ll leverage the NextAuth library to streamline the authentication process. Before diving in, it’s essential to familiarize ourselves with the NextAuth library.
Please ensure you have the latest version of Node.js installed before we begin.
What is NextAuth?
NextAuth is a user-friendly, open-source authentication library specifically crafted for Next.js and serverless applications. Its seamless integration eliminates the need to set up and manage databases for authentication purposes. With NextAuth, users can effortlessly sign in using their preferred existing accounts. Additionally, NextAuth offers a variety of pre-defined providers for streamlined authentication.
Setup Project
Setting up your Next.js project involves choosing between two routers: the App Router and the Pages Router. The App Router, newer and more versatile, enables the utilization of advanced React features like Server Components and Streaming. On the other hand, the Pages Router, the original Next.js router, is suitable for building server-rendered React applications and remains supported for older Next.js projects.
For our demonstration, we’ll opt for the Pages Router.
To kickstart your Next.js project, simply run the following command:
npx create-next-app@latestFor further details, refer to this link
After installation, you’ll encounter the following prompts:
What is your project named? my-app
Would you like to use TypeScript? No / Yes
Would you like to use ESLint? No / Yes
Would you like to use Tailwind CSS? No / Yes
Would you like to use `src/` directory? No / Yes
Would you like to use App Router? (recommended) No / Yes
Would you like to customize the default import alias (@/*)? No / Yes
What import alias would you like configured? @/*
After the prompts, create-next-app will generate a folder with your specified project name and proceed to install all the necessary dependencies.
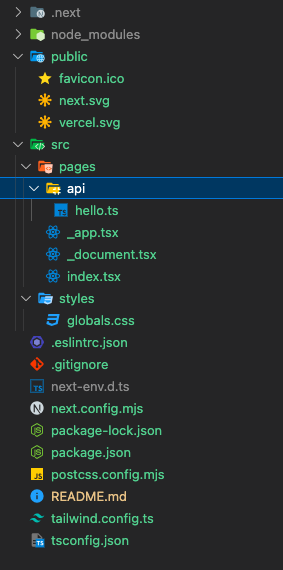
Here, you’ll find the project structure documentation, offering an overview of all possible files and folders within your application.
However, in my case, the folder structure is quite basic
Install NextAuth
To install NextAuth, navigate to the official site at next-auth.js.org and follow the installation instructions provided there.
Alternatively, you can run the following command in your terminal:
npm install next-authAlternatively, you can follow the installation guide provided here:
Once the installation is complete, we can proceed. Start the application using the following command:
npm run devFollowing the Next.js documentation, we’ll begin by integrating NextAuth into our application. First, we’ll create a new folder named ‘auth‘ inside the ‘pages/api‘ folder. Inside this new ‘auth‘ folder, we’ll create a file called ‘[…nextauth].tsx‘.
Api Routes
Next, within the recently created ‘[…nextauth].tsx‘ file, we’ll configure the global NextAuth settings for the GitHub provider.
This file will serve as the dynamic route handler for NextAuth, housing all of your global NextAuth configurations.
// pages/api/auth/[...nextauth].tsx
import NextAuth from "next-auth/next";
import GithubProvider from "next-auth/providers/github";

export default NextAuth({
    providers: [
        GithubProvider({
            clientId: process.env.GITHUB_ID as string,
            clientSecret: process.env.GITHUB_SECRET as string
        })
    ],
    session: {
        strategy: "jwt",
        maxAge: 70 * 30,
      },
    secret: process.env.NEXTAUTH_SECRET,
    callbacks: {
        async signIn({ user, account, profile, email, credentials }) {
            return true
          },
          async redirect({ url, baseUrl }) {
            return baseUrl
          },
          async session({ session, token, user }) {
            return session
          },
          async jwt({ token, user, account, profile, isNewUser }) {
            return token
          }
      },
})
- Importing GithubProvider from next-auth/providers/github
- Providers is an array in which we can provide multiple providers like GitHub, google, apple, Facebook, etc. You can check providers here.
- Adding clientId and clientSecret which we can access from the environment variable into the GitHub provider.
Let’s retrieve the client ID and client secret from GitHub:
- Go to GitHub and sign in if you haven’t already.
- Click on your profile picture (PFP).
- Select ‘Settings‘ from the dropdown menu.
- Scroll down and click on ‘Developer settings’.
- Choose ‘OAuth apps‘ from the sidebar.
- Click on ‘Register a new application‘.
- Name your application as you like, then fill in the homepage URL and Authorization callback URL as shown in the image. Click on ‘Register application’ to proceed.
- The homepage URL should match the URL of your application’s homepage.
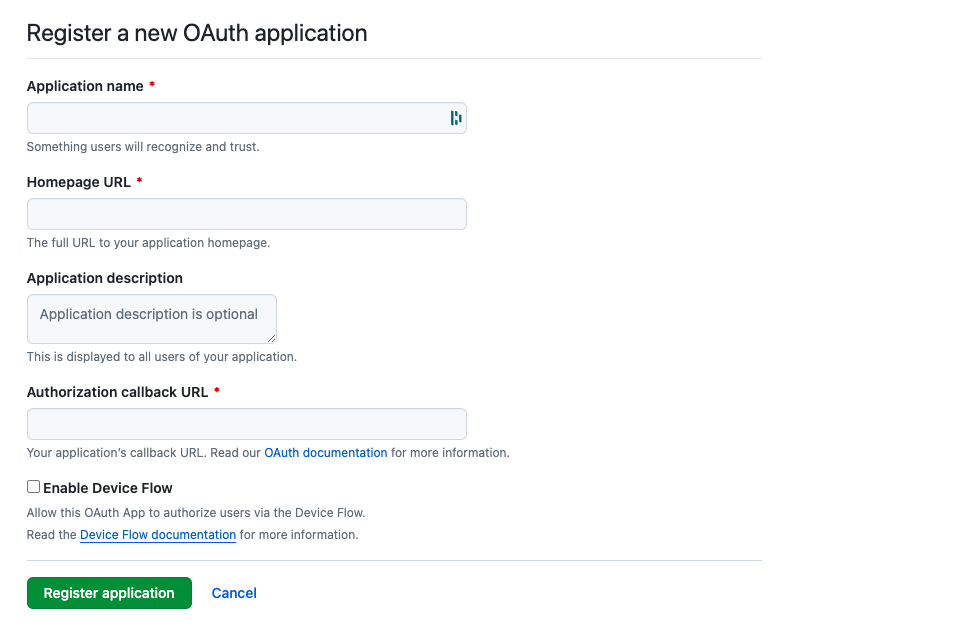
After registering your application on GitHub, it’s crucial to securely store both your client ID and client secret for future use in your NextAuth configuration.
This ensures the integrity and security of your authentication process.
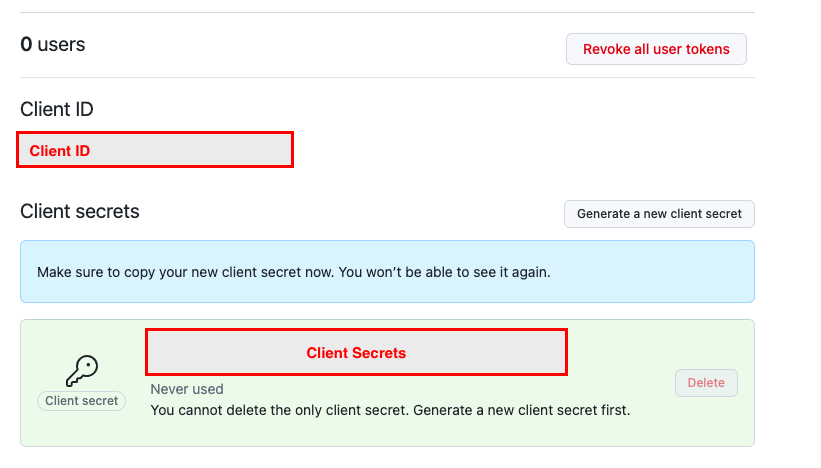
Now, put that copied id and secret to .env file.
NEXTAUTH_SECRET=<secret>
NEXTAUTH_URL=http://localhost:3000/

GITHUB_ID=<your clientID>
GITHUB_SECRET=<your clientSecret>
Done with GitHub lets move on to _app.tsx
Use Session State
To import the SessionProvider in your _app.tsx file and use the useSession() React Hook from the NextAuth client, follow these steps:
- Import SessionProvider from next-auth/react.
- Wrap your entire application with SessionProvider in your _app.tsx file.
- Use the useSession() hook wherever you need to check if a user is signed in.
Here’s how you can do it:
import "@/styles/globals.css";
import { SessionProvider } from "next-auth/react";
import type { AppProps } from "next/app";

export default function App({ Component, pageProps }: AppProps) {
  return <SessionProvider><Component {...pageProps} /></SessionProvider>;
}
By wrapping your application with SessionProvider, the session object will be available in your page props, allowing you to use the useSession() hook wherever needed to check the user’s sign-in status.
Update Home Page
To update your home page and conditionally render HTML sections based on the user session, you can utilize the useSession() hook.
Here’s how you can do it:
// pages/index.tsx

import { signIn, signOut, useSession } from "next-auth/react";

export default function Home() {

  const {data: session, status} = useSession();

  return (<div className="max-w-screen-lg m-auto">
    <div className="bg-gray-300 p-5 rounded-xl mt-3">
      <div className="text-2xl font-bold">Blog</div>
    </div>
    <div className="mb-5 py-5">
      {session && (
        <>
          <div className="text-xl font-bold mb-4">Home Page</div>
          <div className="py-5">
            <div className="flex min-w-full">
              <div>
                {session.user != undefined && (
                  <>
                    <span className="text-base font-bold">Name: {session.user.name}</span>
                    <div>Email: {session.user.email}</div>
                  </>
                )}
              </div>
              <div className="text-right mr-0 ml-auto">
                <button onClick={()=> signOut()} className="bg-purple-900 text-white rounded-xl px-5 py-3 hover:bg-purple-200 hover:text-purple-950">Signout</button>
              </div>
            </div>
          </div>
          <div className="text-base text-gray-500">
            Lorem Ipsum is simply dummy text of the printing and typesetting industry. Lorem Ipsum has been the industry standard dummy text ever since the 1500s, when an unknown printer took a galley of type and scrambled it to make a type specimen book. It has survived not only five centuries, but also the leap into electronic typesetting, remaining essentially unchanged. It was popularised in the 1960s with the release of Letraset sheets containing Lorem Ipsum passages, and more recently with desktop publishing software like Aldus PageMaker including versions of Lorem Ipsum.
          </div>
        </>
      )}
      {!session &&(
        <>
          <div className="text-xl font-bold">Login to view content</div>
          <div className="py-5">
            <button onClick={()=> signIn('github')} className="bg-purple-900 text-white rounded-xl px-5 py-3 hover:bg-purple-200 hover:text-purple-950">Signin</button>
          </div>
        </>
      )}
    </div>
  </div>);
}
In this example:
- We use the useSession() hook to access the session data.
- If session exists (i.e., the user is authenticated), we render content tailored for authenticated users, displaying a user’s name and a sign-out button.
- If session is null (i.e., the user is not authenticated), we render content for non-authenticated users, displaying a sign-in button.
You can further customize the content and UI based on your specific requirements and design preferences.
Indeed, the useSession() hook provides us with the session details of the user, allowing us to easily access information such as the user’s name, email, provider, etc.
Additionally, NextAuth provides several methods to handle authentication-related tasks like sign-in, sign-out, and session management.
These methods can be accessed via the signIn, signOut and useSession functions.
Now, upon refreshing the application, non-authenticated users will see the layout described below.

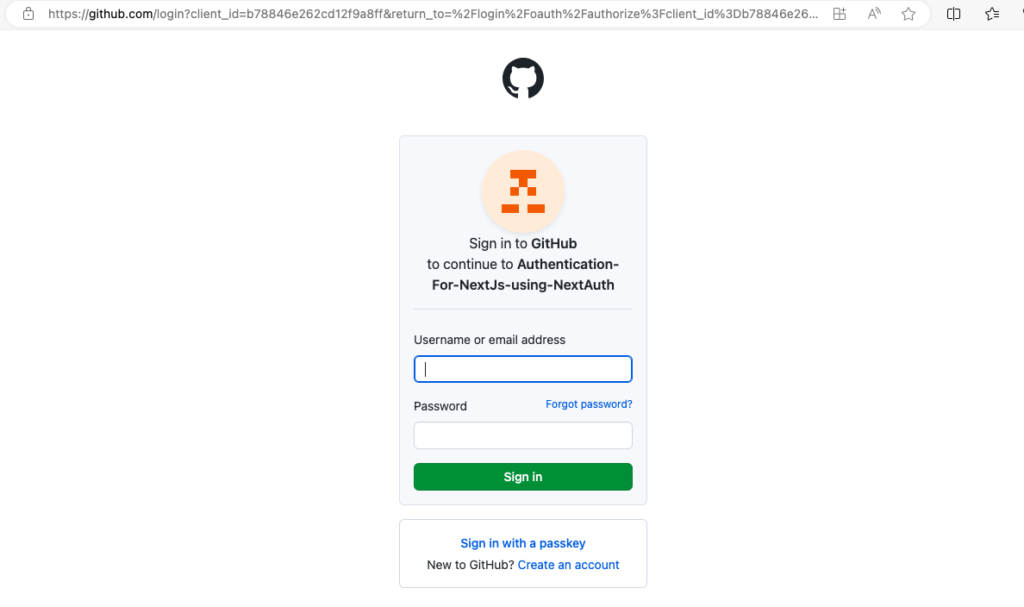
When the user clicks the sign-in button, they will be redirected to the sign-in page, as depicted in the screenshot below.
If the user is not logged in with GitHub, the following screen will be displayed.
If the user is already logged in with GitHub and then clicks on the sign-in button, the following screen will be displayed.
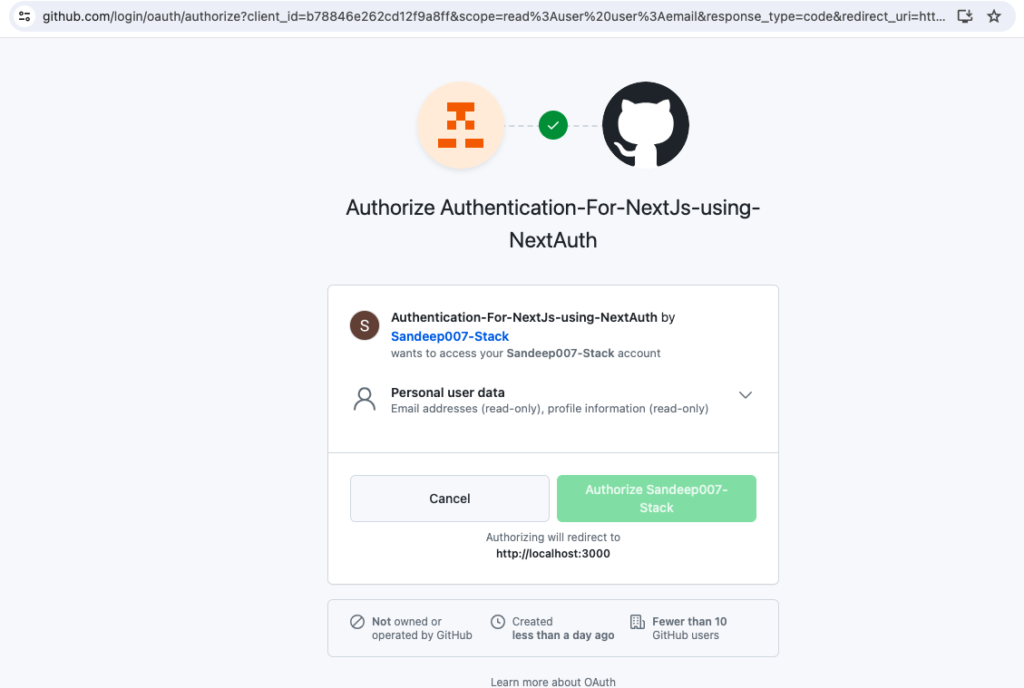
After the user authorizes the login, they will be redirected to the home page, which will be displayed as shown in the screenshot below.

Check out my GitHub for source code
https://github.com/Sandeep007-Stack/Authentication-For-NextJs-using-NextAuth
Conclusion
Throughout this article, we’ve walked through the process of integrating GitHub authentication into a Next.js application using NextAuth. We began by understanding the fundamentals of NextAuth and proceeded to build a blog application for demonstration purposes. Now equipped with this knowledge, you might be wondering how to implement authentication in your own Next.js project. You can further explore NextAuth through the Next.js Documentation to expand your understanding and enhance your projects.
