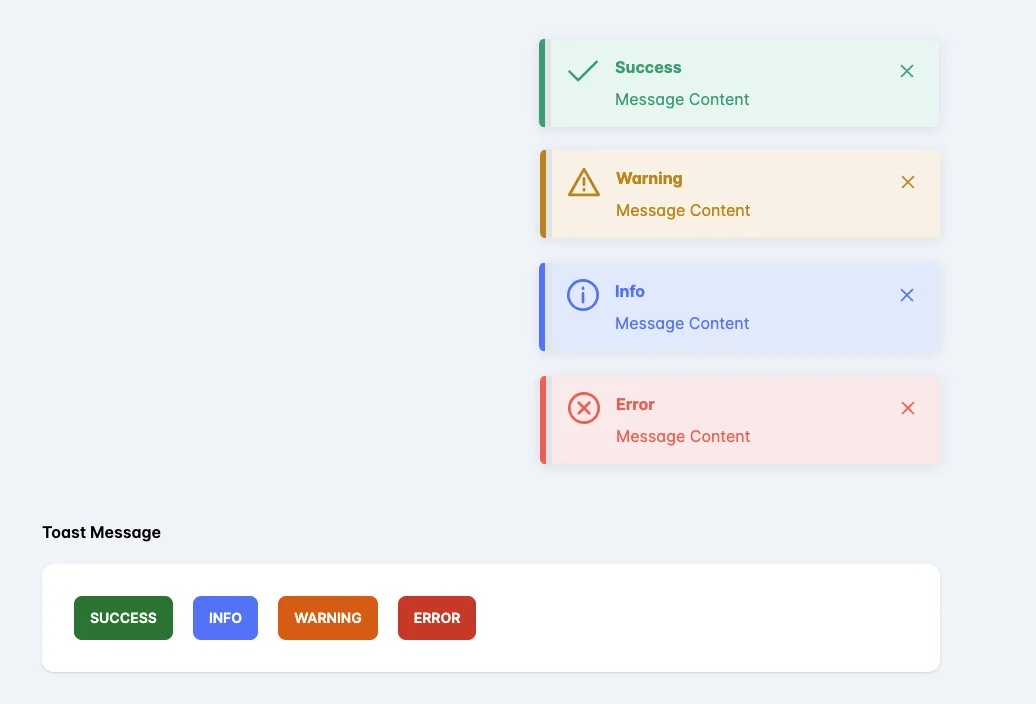
Toast notifications are widely used to promptly inform users about their actions within an application. Although numerous pre-built libraries exist for implementing toast notifications in Next.js projects, this guide focuses on utilizing the ReactPrime library. We’ll demonstrate how to integrate it seamlessly into your project, ensuring global accessibility through context API-powered functions.
As mentioned earlier, we’ll be incorporating the ReactPrime library for toast notifications, as it’s a prerequisite for this guide. To begin, we need to install the ReactPrime library along with its dependencies.
// with npm
npm install primereact
Once the installation is complete, we’ll proceed with the configuration process for ReactPrime.
import { PrimeReactProvider, PrimeReactContext } from 'primereact/api';For more detailed instructions, please refer to the installation guide provided here.
Now that our Next.js project and its dependencies are set up, we can proceed to create the toast notification component.
Creating toast notification component
To begin, let’s create a new file named ToastMessage.tsx inside the src/components folder. Within ToastMessage.tsx, we’ll define our function component ToastMessage, which will render the markup for the ReactPrime toast notification.
// ToastMessage.tsx
import React, { useEffect, useRef } from "react";
import { Toast } from "primereact/toast";

type ToastType = {
    heading: string;
    message: string;
    type?: "error" | "success" | "info" | "warn"
    duration?: number;
}
type ToastData = {
  toast:ToastType | undefined
}

const ToastMessage = (props:ToastData) => {
  const toast = useRef<Toast>(null);

  useEffect(() => {
    toast.current?.show({
      severity: props.toast?.type,
      summary: props.toast?.heading,
      detail: props.toast?.message,
      life: props.toast?.duration ? props.toast.duration : 5000,
    });
  }, [props.toast]);

  return <Toast ref={toast} />;
};

export default ToastMessage;
Creating Toast Notification Context
Now that we have our ToastMessage component in place, let’s proceed to the next step: creating a context for our toast notifications:
To begin, let’s create a new file named ToastContext.tsx in the src/hooks folder. Inside this file, we’ll utilize the createContext function provided by React to create a new context.
// ToastContext.tsx
import { createContext } from "react";

interface ToastContextType {
  success: ({heading,message, duration}:ToastType)=> void
  warning: ({heading,message, duration}:ToastType)=> void
  info: ({heading,message, duration}:ToastType)=> void
  error: ({heading,message, duration}:ToastType)=> void
}

const ToastContext = createContext<ToastContextType | undefined>(undefined);
We’ve successfully created the ToastContext using the createContext function. Additionally, we’ve defined an interface for the context and ensured its usage within our codebase.
Now, let’s create a ToastProvider component that will encapsulate our entire application and furnish the ToastContext to all its descendants or children.
// ToastContext.tsx
export function ToastProvider(props:any){
	const {children} = props;
	return(
        <ToastContext.Provider value={value}>{children}</ToastContext.Provider>
    )
}
Inside the ToastProvider component, we’ll create a function called toastMessage that accepts message and type as arguments, and then proceeds with the necessary actions.
// ToastContext.tsx
const toastMessage = (data:ToastType) =>{
    setToastData({
      ...data
    })
}
We’ll proceed by creating individual functions for each type of toast notification, such as success, warning, info, and error. These functions will internally call the toastMessage function with the appropriate arguments for their respective types and data.
// ToastContext.tsx
const success = ({heading,message, duration}:ToastType) => {
    const toastData:ToastType = {heading,message, duration, type:"success"}
    toastMessageFn(toastData)
};

const warning = ({heading,message, duration}:ToastType) => {
    const toastData:ToastType = {heading,message, duration, type:"warn"}
    toastMessageFn(toastData)
};

const info = ({heading,message, duration}:ToastType) => {
    const toastData:ToastType = {heading,message, duration, type:"info"}
    toastMessageFn(toastData)
};

const error = ({heading,message, duration}:ToastType) => {
    const toastData:ToastType = {heading,message, duration, type:"error"}
    toastMessageFn(toastData)
};
We’ll create a value object that encapsulates all the functions we’ve created, and then pass this object to the value prop of the ToastContext.Provider component. This will enable us to access these functions later from other pages and pass data to display toast messages.
// ToastContext.tsx
const value:ToastContextType = {success, warning, info, error}
Next, we’ll render the ToastMessage component inside the ToastContext component, enabling us to use it globally by passing arguments to the function from other components to display toast messages.
// ToastContext.tsx
return(
    <ToastContext.Provider value={value}>
      {toastData && <ToastMessage toast={toastData}/>}
      {children}
    </ToastContext.Provider>
)
By exporting useToastContext as a custom hook, other components in our application can utilize it to access the toast context. Here’s the code snippet:
export function useToastContext() {
	const context = useContext(ToastContext);
  if(!context){
    throw new Error('useToastContext must be used within an ToastProvider');
  }
  return context;
}
With this hook, components can easily access the toast context and its functions.
Now, we’ll wrap our App component with the ToastProvider component to ensure that the context is available to all children components of our app.
// ToastContext.tsx
<ToastProvider>
   <Component {...pageProps} />
</ToastProvider>
With all the implementation completed, we can now utilize the context to display toast messages in our application. This hook provides a value of the context containing all the toast functions we defined earlier, such as success, error, warning, and info.
To utilize the context, we just need to import it into our App component and call it to gain access to the functions within the value object, passing the necessary arguments to display the desired toast message.
// ProductList.tsx
import { Button } from 'primereact/button';

const ProductList = () => {
  const toast = useToastContext();

  return (
    <div>
        <Button onClick={() => toast.success({heading: "Success", message: "Success toast message."}} label="Success"  severity="success" />

        <Button onClick={() => toast.warning({heading: "Warning", message: "Warning toast message."}} label="Warning"  severity="warning" />

        <Button onClick={() => toast.error({heading: "Danger", message: "Danger toast message."}} label="Danger"  severity="danger" />

        <Button onClick={() => toast.info({heading: "Info", message: "Info toast message."}} label="Info"  severity="info" />
    </div>
  );
};

export default ProductList;
Conclusion
In our comprehensive exploration within this blog, we delved into multifaceted aspects surrounding the construction of the Toast Notification component. This encompassed the meticulous creation of a context, alongside crafting a sophisticated Toast component and hook.
With the integration of this refined Toast notification component, you gain the ability to seamlessly incorporate visually stunning and insightful notifications into your application. The versatility for customization knows no bounds, empowering you to tailor the component precisely to your unique requirements.
We trust that this blog has served as both a guiding beacon and a wellspring of knowledge, offering invaluable insights along your developmental journey. We fervently encourage you to embark on the endeavor of crafting your own bespoke Toast notification component, leveraging the prowess of Next.js, React.js, and the Context API.


